
Key facts: Structural Drying
- EPA advises drying water-damaged materials within 24 to 48 hours to prevent mold growth [1].
- The ANSI/IICRC S500 standard describes the principles of drying, moisture measurement and documentation for water damage restoration [2].
- Drying is complete when moisture readings in affected materials match readings from unaffected materials of the same type.
- Illinois insurance guidance says to remove water, ventilate and dry the property as soon as possible and to keep receipts for mitigation [3].
- Opening walls in homes built before 1978 may disturb lead paint, which brings EPA's lead-safe work rules into play [4].
How it works
The science of drying a soaked building
Wet materials dry when water moves from the material into the air and the air carries it away. Three things control how fast that happens: how much moisture the air can still hold, how much air moves across the wet surface, and how warm the material is. Structural drying manages all three on purpose rather than leaving them to the weather.
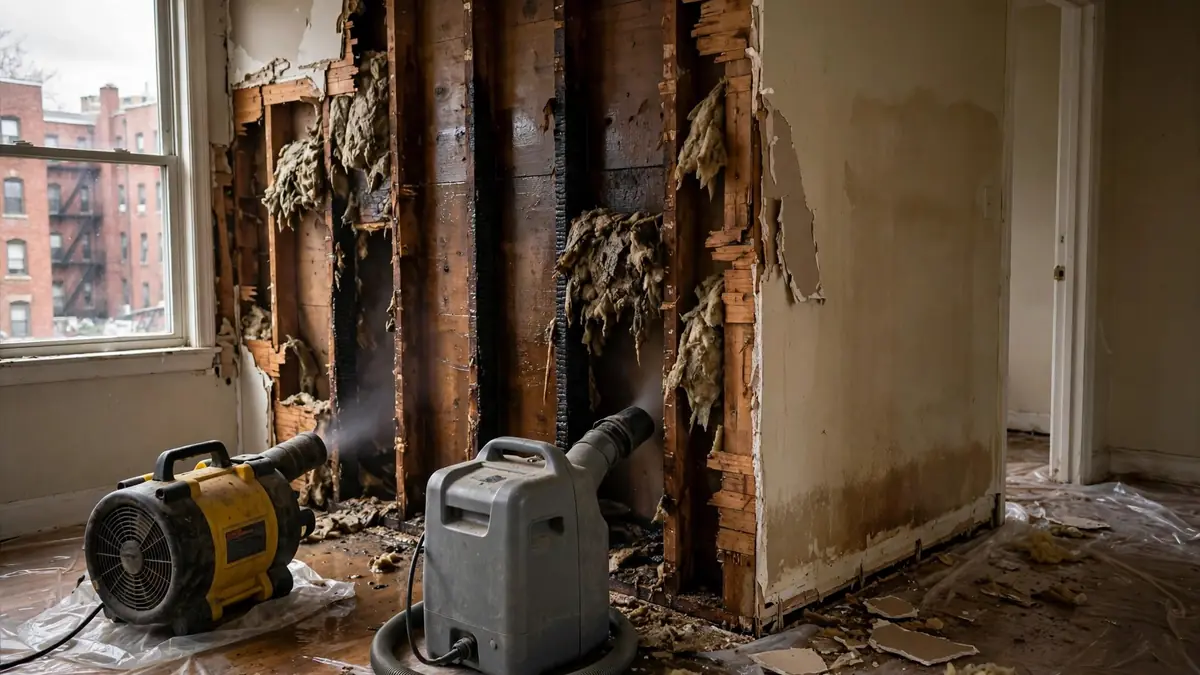
Dehumidifiers pull moisture out of the air so it stays thirsty. Air movers push that dry air across wet surfaces, breaking up the thin layer of humid air that sits right against them. Controlled warmth speeds evaporation from inside dense materials. Set up together and adjusted as the job progresses, they dry a house far faster and more evenly than open windows and household fans.
The ANSI/IICRC S500 standard sets out these principles, along with how to inspect, measure moisture, choose equipment and document the drying [2]. After a fire, that work happens alongside the smoke and soot cleanup described in the S700 standard, which is why the two are usually planned together.
Speed matters because of mold. EPA's guidance is to dry wet areas within 24 to 48 hours to prevent growth [1]. Structural drying cannot always finish in that window, especially in dense materials, but starting quickly keeps the surface and cavities from becoming a mold problem while the deeper drying continues.
Signs
Signs the structure is still holding water
Wet readings below dry-looking paint
A wall can feel dry to the hand while a meter shows high moisture in the plaster or studs behind it.
Cupping floorboards days later
Boards that keep curling after the surface dried are taking up water from the subfloor below.
Damp basement ceilings
Joists and the underside of the subfloor stay wet long after the upper floor seems fine.
Peeling or blistering paint
Moisture moving out through the wall pushes paint away from the surface.
Musty smell mixed with smoke
An earthy odor under the smoke smell suggests microbial growth starting in a wet area.
Efflorescence on masonry
White, powdery deposits on brick or foundation walls show water moving through the masonry.
The drying
Structural drying step by step
- 1
Establish dry standards
Moisture readings are taken in unaffected areas for each material, such as plaster, drywall, framing and flooring, to set the target.
- 2
Map the wet areas
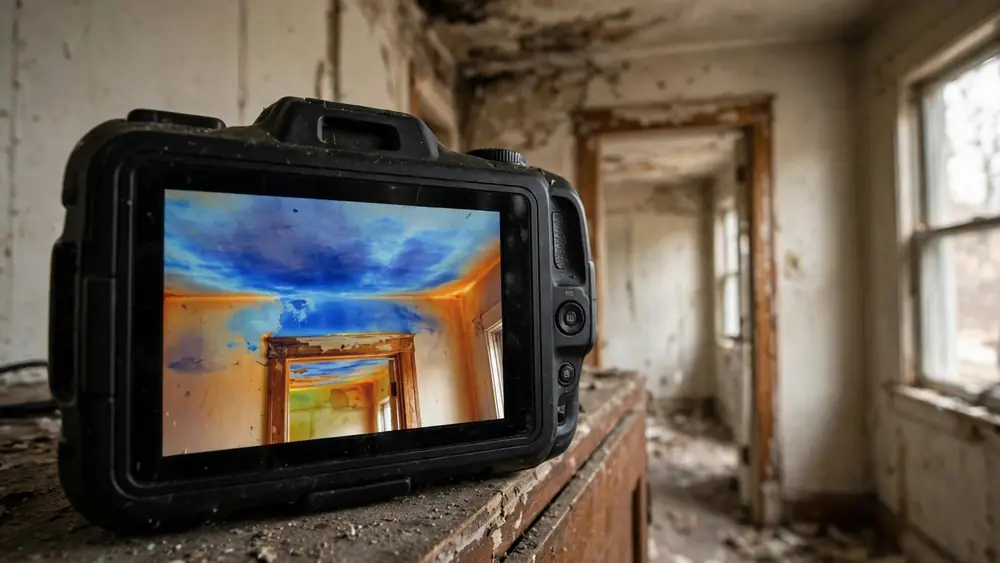
Meters and thermal imaging trace how far water traveled through floors, walls and ceilings; the map is drawn and photographed.
- 3
Remove what blocks drying
Wet insulation, soaked carpet pad, vinyl that traps water and baseboards are removed so air can reach the structure.
- 4
Open cavities where needed
Small holes or flood cuts let dry air into wall cavities; in pre-1978 homes, lead-safe practices apply when painted surfaces are cut [4].
- 5
Set dehumidifiers and air movers
Equipment is sized to the space and the amount of water, and arranged to move air across every wet surface.
- 6
Add specialized systems
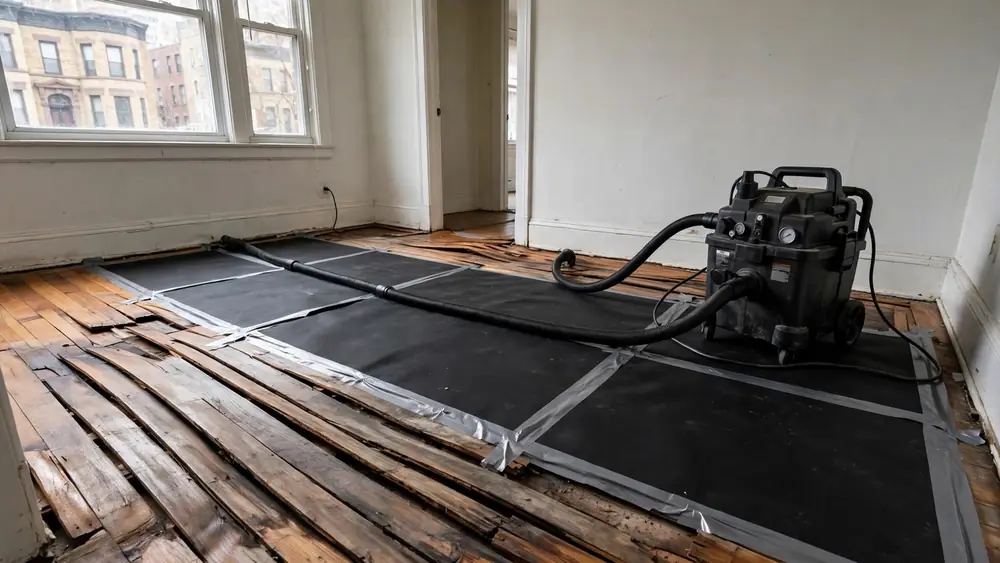
Floor drying mats, injection systems for wall cavities and controlled heat are used for hardwood, plaster and dense materials.
- 7
Contain the drying zone
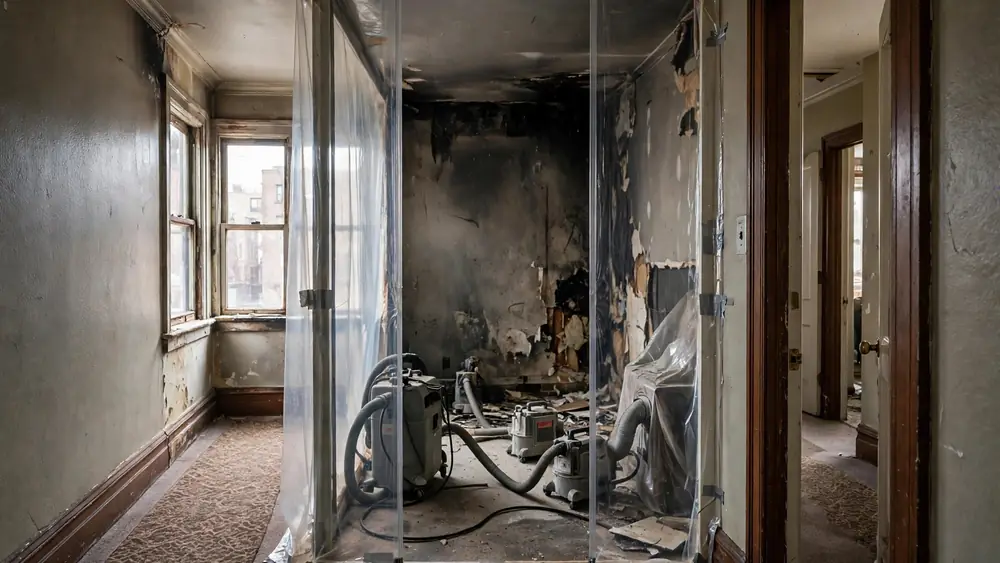
Plastic sheeting keeps dry air in the work area and stops it from spreading smoke residue to clean rooms.
- 8
Measure and adjust daily
Moisture readings are logged every day and equipment is moved or reduced as areas dry [2].
- 9
Confirm dry, then rebuild
When readings match the dry standard, equipment comes out and repairs can start.
Equipment
Drying equipment and what each piece does
| Equipment | What it does | Where it is used |
|---|---|---|
| Refrigerant dehumidifier | Condenses moisture from the air | Most rooms in mild to warm conditions |
| Desiccant dehumidifier | Absorbs moisture; works in cooler air | Cold buildings, basements, winter drying |
| Air movers | Push dry air across wet surfaces | Floors, walls, ceilings |
| Floor drying mats | Pull moisture up through hardwood | Wood floors that cupped or soaked |
| Wall cavity injection | Forces dry air into closed cavities | Plaster and drywall walls that can be left in place |
| Controlled heat | Raises material temperature to speed evaporation | Dense materials, plaster, cold conditions |
| HEPA air scrubbers | Capture airborne particles | Fire jobs, so drying does not spread soot |
What you can do yourself
How to help the drying along
- Leave the equipment runningTurning off dehumidifiers or air movers overnight to reduce noise sets the drying back.
- Keep doors and windows as the crew sets themOpening windows on a humid day can add moisture; the crew decides when outside air helps.
- Empty dehumidifier buckets if askedSome units drain to a pump or sink; others need emptying.
- Keep the drying area clearBelongings left against wet walls or on wet floors block airflow and can be damaged.
- Report new problemsNew stains, smells or cupping boards are worth reporting to the crew right away.
Local specifics
Drying plaster, masonry and old-growth framing in Chicago
Chicago's older housing is built from materials that hold water differently from modern construction. Plaster over wood lath or masonry is dense and slow to dry, and it can lose its bond to the lath if it stays wet. Brick and limestone walls in bungalows and greystones absorb water and release it slowly [5][6]. Old-growth framing lumber is often harder and denser than modern studs.
These materials can usually be dried in place, which is good news, because plaster and original woodwork are worth keeping. But they take longer, and they respond best to slow, controlled drying. Drying plaster too fast with high heat can crack it. Drying hardwood floors too fast can split boards. A crew used to vintage homes adjusts the equipment accordingly.
Basements matter here too. Water from upper floors collects on basement floors and soaks into foundation walls. Many Chicago basements are finished living space or garden apartments, with drywall, carpet and paneling that trap moisture against the masonry. Those finishes often have to come out so the foundation and framing can dry.
Chicago weather shapes the plan. In winter, the air outside is cold and dry, and heating the building helps drying, but a wet building without heat can freeze. In summer, outdoor humidity is high, so windows usually stay closed and dehumidifiers do the work.
Measuring
Why moisture readings matter more than appearance
You cannot see or feel whether a stud inside a wall is dry. Paint and plaster surfaces dry first and look normal while the wood and the back of the plaster are still wet. That is why professional drying relies on instruments.
Pin meters measure moisture in wood and other materials directly. Pinless meters scan through surfaces to show relative moisture. Thermal cameras spot cooler, damp areas over large surfaces quickly, though their findings are confirmed with meters. Hygrometers measure the humidity in the room and the output of the dehumidifiers.
The readings go into a log with the date, location and value. That log shows when each area reached its dry standard, and it is the record your adjuster and any future buyer of the home can rely on. If a contractor does not keep one, ask why.
Quick reference
How long different materials usually take to dry
| Material | Relative drying time | Notes |
|---|---|---|
| Drywall, surface wet | Fast | Often dries in a few days if not contaminated |
| Wood studs and joists | Moderate | Several days; dense old lumber takes longer |
| Hardwood flooring | Slow | Floor mats and patience; may need refinishing |
| Plaster on lath | Slow | Controlled drying to avoid cracking |
| Brick and limestone walls | Slow | Can take weeks; watch for efflorescence |
| Concrete basement floor | Moderate to slow | Depends on thickness and how long water stood |
Fire and water together
Drying without spreading the smoke residue
Drying equipment moves a lot of air. In a fire-damaged home, that air can pick up soot and spread it into rooms that were clean. That is why drying after a fire is usually set up with containment barriers around the wet areas and HEPA air scrubbers running alongside the dehumidifiers.
Sequence matters as well. Heavy soot is often vacuumed off surfaces before high-velocity air movers are aimed at them, and porous materials that are both wet and smoke-soaked, such as insulation, are removed rather than dried. Coordinating the drying with the smoke cleanup is one reason many owners use a single restoration contractor for both [7].
Mold
Keeping mold out of the cavities
Wall and ceiling cavities are dark, still and, after a fire, often wet. Those are good conditions for mold. If a cavity stays wet for several days, growth can start on the back of the drywall, on insulation paper and on framing.
EPA's guidance is to fix the moisture problem and dry materials quickly, and to throw away porous materials that cannot be cleaned and dried [1]. For larger areas or when contaminated water was involved, EPA suggests professional cleanup [8]. In practice, that means opening cavities that cannot be dried in place, removing wet insulation and confirming the framing is dry before closing it up.
DIY or professional
Drying work owners can do and work that needs instruments
Owner
Moving belongings, keeping equipment running, mopping hard floors, opening drawers and cabinet doors.
Drying crew
Moisture mapping, equipment sizing, wall cavity drying, floor drying systems, daily logs.
Specialist
Lead-safe work in older homes, structural evaluation of sagging framing, electrical inspection.
The visit
Questions to ask a structural drying contractor
Ask how they set the dry standard for each material, how often they will take readings and whether you will receive the log. Ask which materials they plan to remove, which they will dry in place and why. Ask how they will protect clean rooms from soot spread by the airflow.
In older homes, ask how they will handle plaster and hardwood, and whether their crew is certified for lead-safe work if walls will be opened [4]. Ask how the equipment's power draw will be handled if the building's electrical system was damaged.
Finally, ask what happens when drying is done: who rebuilds, and whether repairs such as drywall, framing or electrical work need Chicago building permits [9]. The Illinois Department of Insurance advises getting your adjuster's agreement before contracting for repairs [3].
Prevention
Making future water damage easier to dry
Some choices make a home easier to dry the next time water gets in. In finished basements, materials like tile and moisture-resistant wall panels dry better than carpet and paper-faced drywall. Shelving that keeps stored items off the floor protects them and leaves floors open to airflow.
Knowing where the main water shutoff is, and making sure every adult in the home does too, limits damage from any source. Working smoke alarms on every level catch fires early, which means smaller fires and less water used to fight them [10].
Dry or remove
When drying in place is not the right call
Drying in place is the goal for sound materials, but not for everything. Insulation that soaked up water is usually removed, because it dries poorly and holds smoke residue. Particleboard and some engineered wood products swell and lose strength. Drywall that soaked up sooty water or sagged is normally replaced.
Framing, plaster, solid hardwood, masonry and concrete usually dry well and are worth keeping. Where a material is borderline, the contractor's readings and photos should explain the decision, and your adjuster should see the evidence before materials are removed [3].
Checklist
Structural drying checklist
- Dry standards recorded for each material
- Moisture map drawn and photographed
- Wet insulation, pad and baseboards removed
- Cavities opened where needed, lead-safe in older homes
- Containment and HEPA air scrubbers set up
- Daily readings logged and shared
- Equipment adjusted as areas dry
- Final readings match dry standards before rebuilding
Related problems
Services that work alongside structural drying
Water damage from firefighting
Extraction and first response to hose and sprinkler water.
Read moreResidue cleaning as it dries
Cleaning residue as surfaces dry.
Read moreIs it safe to stay?
Living arrangements while the house dries.
Read more
Winter drying
Drying a fire-damaged home in a Chicago winter
Winter changes the drying plan. Cold outdoor air holds very little moisture, which sounds helpful, but cold materials release water slowly and standard refrigerant dehumidifiers lose efficiency below room temperature. If the building's heat is off after the fire, the drying area may be close to freezing.
Crews handle this in a few ways. Where it is safe, the building's heat is restored to the undamaged areas. Temporary heat can be brought in for the drying zone. Desiccant dehumidifiers, which keep working in cooler air, are often used instead of or alongside refrigerant units. The plumbing has to be protected throughout, since a frozen pipe adds a new leak to a house that is already wet.
Winter drying usually takes longer, so the daily readings matter even more. Expect the crew to adjust equipment as temperatures change.
Multi-unit buildings
Drying several units at once
Firefighting water rarely stays in one unit. In a two-flat or three-flat, it travels down through the floors; in a courtyard building or high-rise, it can spread along floors and down through several units. Drying each unit separately, with different crews and schedules, tends to leave wet areas between them, such as the floor-ceiling assembly shared by two units.
The most effective approach is a single drying plan for all affected spaces, coordinated by the building owner or association with the owners and tenants. The moisture map then covers the whole path the water took. Each household still deals with its own insurer for its belongings, and the building's policy usually handles the structure. Sharing the drying log with everyone involved avoids disputes about whether a shared ceiling or floor was dried.
Documentation
The drying record and why to keep it
Keep a copy of the moisture map, the daily readings, the equipment list and the photos. Together they show your insurer that the home was dried properly and promptly, which supports the claim. They also matter later: if you sell the home, a buyer may ask about past water damage, and a complete drying record answers the question with evidence.
If mold ever appears in an area that was dried, the log helps show whether the problem relates to the original water or something new. It is a small amount of paperwork that can save a lot of argument.
Electrical
Power for the drying equipment in a damaged building
Dehumidifiers, air movers and air scrubbers draw a lot of electricity, and after a fire the building's electrical system may be damaged, shut off or unsafe in the wet areas. Plugging drying equipment into outlets in a wet room is never a good idea.
Crews usually work with an electrician to confirm which circuits are safe, run equipment from undamaged circuits, or bring in temporary power. Ask how the equipment will be powered before it arrives, and do not reset tripped breakers in wet areas yourself. The Illinois Department of Insurance advises having electrical equipment checked by a professional before use after a loss [3].
Once the building's own wiring has been inspected and repaired where needed, the equipment can switch over, and any temporary power can be removed.
FAQ
Structural drying questions
What is structural drying?
Structural drying is the controlled removal of water from a building's framing, subfloors, walls and ceilings using dehumidifiers, air movers and specialized systems, measured with moisture meters until materials return to normal levels.
How long does structural drying take?
Many homes dry in several days to two weeks. Dense materials common in older Chicago homes, such as plaster, brick and old hardwood, can take longer, especially in cold weather.
Do the walls have to be torn out to dry them?
Not always. Small holes and cavity drying systems can dry many walls in place. Walls are opened when insulation is soaked, when sooty water was involved or when the cavity cannot be dried any other way.
Can I turn off the drying equipment at night?
It is best not to. Drying depends on continuous dehumidification and airflow; turning equipment off lets humidity rise and slows the process.
How do I know the house is really dry?
Ask for the moisture log. When readings in the affected materials match readings in unaffected materials of the same type, the structure is dry.
Why is the drying crew removing my baseboards?
Baseboards trap moisture against the wall and hide the bottom of the cavity. Removing them lets air reach the wall and the floor edge, and they can often be reinstalled.
Can wet plaster walls be saved?
Often, yes. Plaster can usually be dried in place with slow, controlled drying, as long as it is still firmly attached to the lath or masonry.
Does structural drying stop mold?
Drying quickly is the most effective way to prevent mold. EPA advises drying water-damaged materials within 24 to 48 hours. Areas that stay wet longer should be checked for growth.
Why does the drying equipment make the house so warm?
Dehumidifiers release heat as they work, and warmer materials give up moisture faster. A warm, dry room is a sign the equipment is doing its job; the crew balances it so plaster and wood are not dried too aggressively.
Can hardwood floors be refinished right after drying?
Floors should rest at normal moisture for a period before sanding, because boards that are still settling can cup or gap again. The contractor’s readings tell you when the floor is stable enough to refinish.
Sources and citations
- [1]U.S. EPA — A brief guide to mold, moisture and your home
- [2]IICRC — ANSI/IICRC S500 Standard for Professional Water Damage Restoration
- [3]Illinois Department of Insurance — What to do after an insured homeowners loss
- [4]U.S. EPA — Lead Renovation, Repair and Painting Program
- [5]Wikipedia — Chicago bungalow
- [6]Wikipedia — Greystone (architecture)
- [7]IICRC — ANSI/IICRC S700 Standard for Fire and Smoke Damage Restoration
- [8]U.S. EPA — Mold cleanup in your home
- [9]City of Chicago — Department of Buildings permits
- [10]NFPA — Smoke alarms